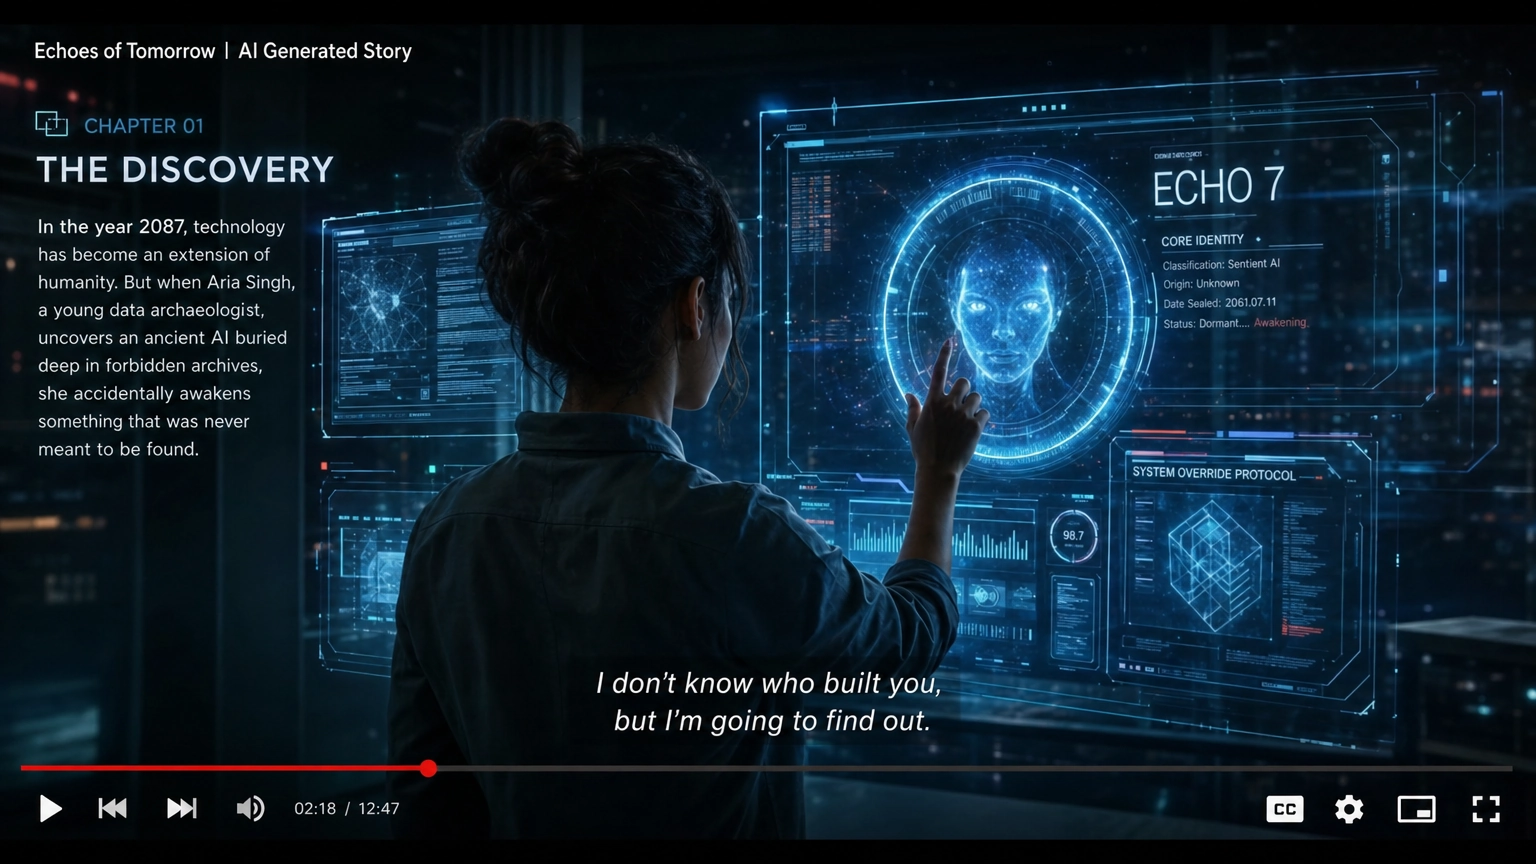
If you’re learning how to create AI story videos, the job is simple to describe and easy to underestimate: turn an idea into a coherent short film with a script, consistent characters, generated visuals, voiceover, sound, and a final edit that feels intentional.
The difference between an AI story video and a random montage is structure. You need a repeatable workflow for planning shots, generating assets, controlling character identity, and assembling clips into a cinematic narrative. This guide walks through that full pipeline, with practical examples you can adapt for AI short films, social storytelling, brand videos, and AI animated stories.
Why AI Story Videos Need a Production Workflow
AI video creation works best when you treat it like production, not prompt roulette. Current tools can generate impressive images, motion, voices, and music, but they still need direction.
A strong workflow helps you:
- Keep characters visually consistent across scenes
- Avoid wasting generations on vague prompts
- Turn a script into specific shots
- Match voiceover, pacing, and music before the final edit
- Reuse the same process for future AI narrative videos
For creators and technical marketers, this also makes the process easier to scale. A shot table can become a reusable template. Character prompts can become style guides. Reference images and custom models can become production assets.
Phase 1: Story Conceptualization and Scriptwriting
Developing Your Narrative: Plot, Characters, and Setting
Start with the basics: a clear plot, a small cast, and a defined setting.
AI video models still struggle with crowded scenes, precise physical interactions, and complex continuity. A story with one protagonist, one conflict, and a few strong visual motifs will usually work better than a sprawling ensemble scene.
Before you generate anything, define:
- Premise: What changes from the beginning to the end?
- Main character: What do they look like, want, and fear?
- Setting: Where does the story happen?
- Mood: Is it eerie, hopeful, comic, noir, mythic, or documentary-like?
- Visual rules: What colors, lenses, lighting, and texture should repeat?
For example:
A lone courier crosses a flooded cyberpunk city to deliver a memory chip before sunrise. The mood is quiet, tense, and rain-soaked. The visual language uses teal neon, wet asphalt, long shadows, and close-ups of hands, eyes, and reflections.
That is enough to guide a short AI film without overwhelming the tools.
Crafting the AI-Friendly Script
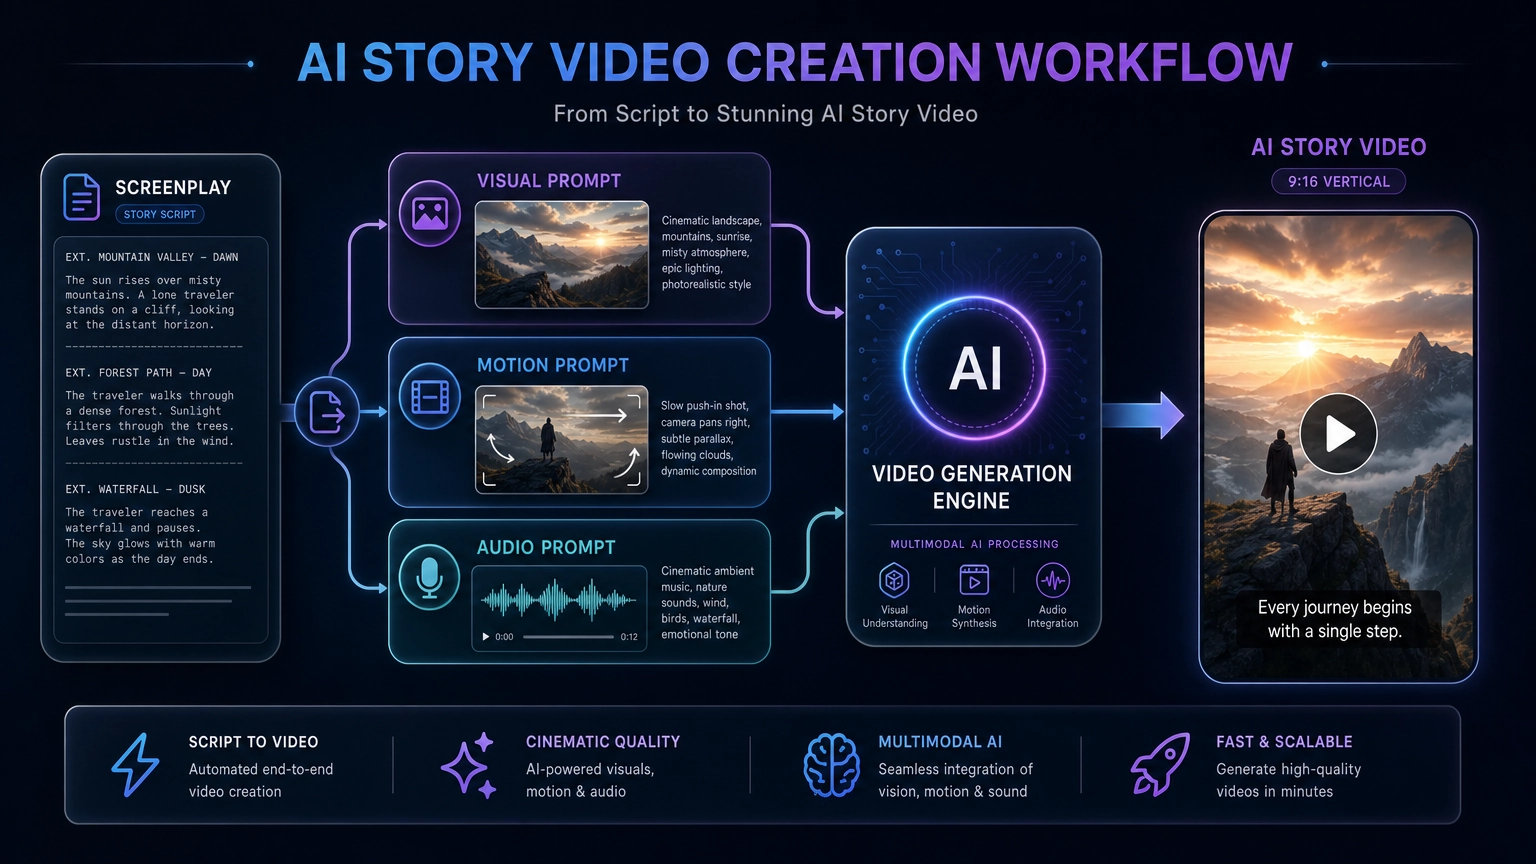
Traditional screenplays do not translate directly into AI prompts. An AI-friendly script breaks the narrative into shots that a generator can understand.
Use a table with these columns:
| Shot | Visual Prompt | Motion Prompt | Audio / Voiceover |
|---|---|---|---|
| 1 | Wide shot of a flooded cyberpunk street at night, teal neon signs reflected in water, lone courier in hooded jacket, cinematic lighting | Slow dolly forward, slight handheld movement | Rain, distant traffic, low synth pulse |
| 2 | Close-up of courier’s gloved hand gripping a glowing memory chip, shallow depth of field | Subtle push-in | Voiceover: “By dawn, the city would forget everything.” |
| 3 | Side profile of courier walking past broken vending machines, wet asphalt, neon haze | Slow tracking shot left to right | Footsteps through water, soft electrical buzz |
| 4 | Low-angle shot of drone lights scanning the alley above the courier | Camera tilts up toward drones | Rising tension, mechanical hum |
This is the bridge from AI script to video. You are not just writing story beats. You are writing production instructions.
For each shot, include:
- Composition: wide shot, close-up, low angle, over-the-shoulder
- Subject: who or what is on screen
- Environment: location, weather, props, background
- Lighting: moonlight, neon, golden hour, studio light, candlelight
- Motion: camera movement and subject movement
- Audio: voiceover, dialogue, music, ambience, sound effects
The more specific your shot plan, the easier the rest of the process becomes.
Phase 2: Generating Visuals with AI
Achieving Character and Style Consistency Across Scenes
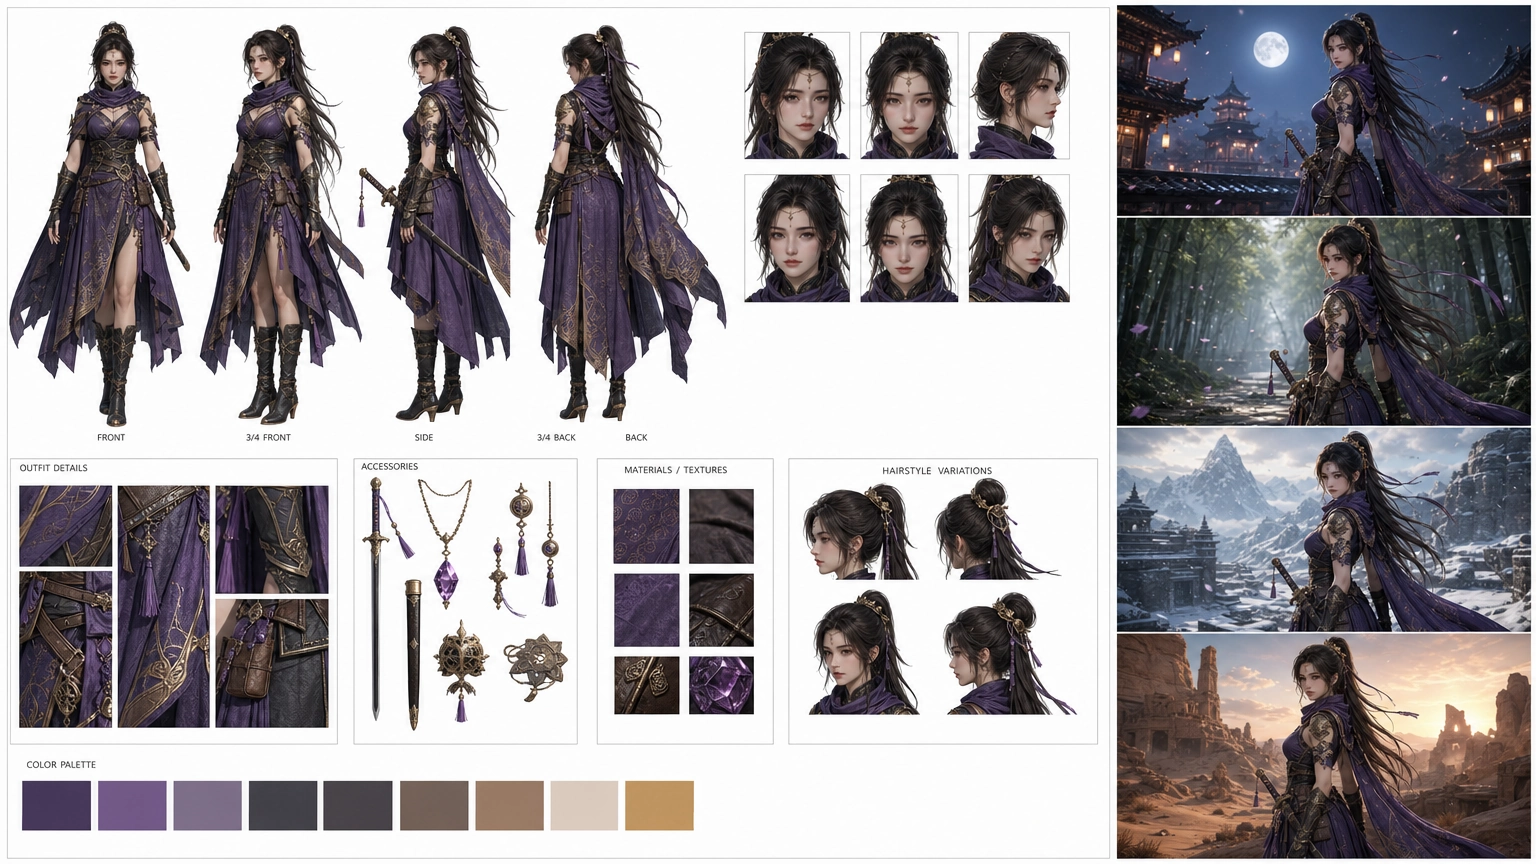
The biggest problem in generative video storytelling is character drift. If your hero changes face, costume, or age between shots, the audience stops believing the story.
Lock down your character before making video clips.
A practical consistency workflow looks like this:
- Generate or design a clean character reference sheet.
- Pick one final character design.
- Save the core identity prompt.
- Use the same style, wardrobe, and lighting language across shots.
- Train or use a custom model when consistency matters.
For recurring characters, training custom AI models is the strongest approach. On Fiddl.art, Forge lets creators train custom models for faces, styles, brands, and recurring visual identities. Once trained, you can reuse the model across scenes instead of relying on a prompt to recreate the same person from scratch.
If you are building fantasy, game, or serialized story assets, the same principles apply. This guide on creating consistent AI characters goes deeper into reference images, seeds, prompt structure, and custom model workflows.
Creating Dynamic Environments and Action Shots
For most story videos, use a two-step visual workflow:
- Text-to-image: Generate high-quality still frames for each shot.
- Image-to-video: Animate those stills with motion prompts.
This gives you more control than jumping straight from text to video. A still image lets you approve composition, character design, lighting, and mood before you spend time animating it.
On Fiddl.art, you can start from the Create canvas, browse different base and custom models in the models catalogue, or explore the public Browse feed for inspiration and “use as input” remix workflows.
If you need prompt ideas, this library of copy-paste AI image prompt examples is useful for building cinematic scenes, portraits, fantasy shots, and stylized visual references.
A good base image prompt might look like this:
Cinematic wide shot of a lone courier standing in a flooded neon alley at night, teal and magenta reflections on wet asphalt, hooded black jacket, rain falling, distant drones in the sky, shallow fog, 35mm anamorphic lens, high contrast lighting, realistic detail, moody cyberpunk atmosphere.
Then your image-to-video prompt can focus on motion:
Slow dolly forward toward the courier, rain rippling in puddles, neon reflections shimmering, subtle handheld camera movement, drones passing overhead in the distance.
Tools such as Luma Dream Machine Ray 3.2 support higher-fidelity video workflows including native 1080p, HDR output, and multi-keyframe direction. Google Veo 3.1 is another current video model family used for high-fidelity motion, environmental lighting, and synchronized audio workflows. Use tools like these to animate the base images you have already art-directed.
Phase 3: Bringing Your Story to Life with Audio
AI Voiceovers: Choosing the Right Tone and Emotion
Silent AI videos can look impressive, but they often feel empty. Voiceover gives the viewer a reason to keep watching.
Start by deciding the role of the voice:
- Narrator: explains the story or adds mood
- Character voice: delivers dialogue or internal monologue
- Guide: useful for explainers, product stories, and educational content
- Hybrid: combines cinematic narration with direct messaging
Choose a voice that matches the genre. A noir mystery may need a tired, gravelly narrator. A children’s story may need a warm, expressive voice. A technical brand film may need clear pacing and confident delivery.
Voice tools now allow more directed performances. For example, ElevenLabs’ Eleven v3 release introduced Audio Tags such as [whispers], [sighs], and [shouts], giving creators more control over emotional delivery inside the script.
A voiceover script can include performance notes:
[whispers] I thought the city had forgotten me.
[sighs] But some memories refuse to stay buried.
Keep lines short. AI voiceovers usually sound more natural when sentences are direct and easy to perform.
Integrating Sound Effects and Background Music
Audio sells the image.
If the viewer sees a city street, add traffic, distant sirens, footsteps, wind, or rain. If a character enters a temple, add low room tone, cloth movement, echo, and subtle stone scrape sounds.
Think in layers:
- Voiceover or dialogue
- Ambience: room tone, forest, rain, traffic, crowd
- Spot effects: door opens, footsteps, paper rustles, sword unsheathes
- Music: emotional pacing and rhythm
- Transitions: risers, impacts, hits, whooshes
Build the soundtrack early. It is usually easier to edit visuals to the beat of music than to force music around finished visuals.
Phase 4: Assembling and Refining Your AI Story Video
Video Editing Essentials: Pacing, Transitions, and Flow
Even strong AI video generation software produces clips with small artifacts. Editing is where you hide weaknesses and emphasize the best moments.
A few rules help:
- Keep AI shots short, often two to four seconds.
- Cut away before faces, hands, or backgrounds start morphing.
- Use hard cuts more often than crossfades.
- Use B-roll to cover narration.
- Let the edit follow the emotional beat, not just the script order.
Hard cuts often feel more cinematic than soft transitions. Crossfades can blend artifacts from two generated shots and make the illusion worse.
A simple 60-second structure:
- 0–5s: Hook image and first line
- 5–15s: Establish world and conflict
- 15–35s: Escalate with action, clues, or emotional tension
- 35–50s: Reveal or turning point
- 50–60s: Final image, line, or call-to-action
Enhancing Visuals: Color Grading and Post-Production
AI-generated clips often come back with slightly different palettes. Color grading makes them feel like one film.
Apply a shared look across the timeline:
- Consistent contrast
- Unified shadows and highlights
- Repeated color bias, such as teal shadows or warm highlights
- Subtle film grain to reduce overly smooth textures
- Light sharpening or upscaling if final clips look soft
If your final footage needs enhancement, compare tools in this guide to the best AI video upscalers.
For editing tools, pick a timeline editor that handles multiple video and audio tracks cleanly. Our review of the best AI video editors covers options for social clips, YouTube, marketing, and more advanced production workflows.
Adding Text Overlays, Subtitles, and Graphics
Subtitles improve accessibility and retention. They are especially important for social platforms where viewers may watch without sound.
Use subtitles that match the tone:
- Minimal white subtitles for cinematic shorts
- Bold kinetic captions for social clips
- Lower-thirds for explainers or branded videos
- Sparse title cards for dramatic pacing
Avoid clutter. If the visuals are doing emotional work, let them breathe.
Top AI Tools for Story Video Creation
A complete AI video production workflow usually combines several tool categories.
Fiddl.art for Visual Development and Consistency
Fiddl.art is useful as the visual base of the workflow:
- Generate character concepts, settings, and keyframes
- Use multiple base and community models
- Train custom models through Forge for recurring characters or styles
- Remix public creations from the Browse feed
- Move from image creation into video workflows through Fiddl.art Create
- Share work in a creator ecosystem where others can unlock art, prompts, or models
For AI story videos, Fiddl.art is especially helpful before animation. It lets you develop the still frames, references, and custom models that make the final video feel consistent.
Video Generators for Motion
Use video models to animate approved keyframes. Keep motion prompts simple and directed:
- “Slow push-in”
- “Camera tracks behind the character”
- “Rain moves across the frame”
- “Subtle head turn toward camera”
- “Drone shot rising over the city”
Avoid asking for too much in one clip. Complex action is better broken into multiple shots.
AI Voiceover Tools
Use voice tools for narration, dialogue, and character performance. Look for:
- Emotional direction
- Voice consistency
- Commercial usage terms that fit your project
- Clean exports
- Support for long-form narration if needed
Editing Suites
Use a proper editor for the final assembly. You need:
- Multi-track audio
- Frame-accurate trimming
- Captions
- Color controls
- Export presets for each platform
AI generates the ingredients. Editing turns them into a story.
Tips for Cinematic AI Storytelling
-
Direct the camera.
Prompts like “close-up on eyes,” “low-angle tracking shot,” and “wide establishing shot” make the scene feel intentional. -
Use reference images.
If you want a specific character, building style, brand look, or lighting setup, guide the model with images instead of relying only on text. -
Design for short shots.
AI video often holds up better in brief, focused clips. Let editing create momentum. -
Use B-roll generously.
You do not need to show a talking character in every frame. Cut to objects, weather, architecture, screens, hands, shadows, and symbolic details. -
Repeat visual motifs.
A recurring color, prop, location, or camera angle gives the story cohesion. -
Save every prompt and setting.
Treat prompts as production assets. Store character prompts, environment prompts, seeds, model choices, and final clip filenames. -
Generate variations deliberately.
Do not make 30 random versions. Change one variable at a time: lens, lighting, camera motion, or expression.
Common Challenges and Solutions in AI Story Production
Flickering and Morphing Textures
Backgrounds, hands, signs, and clothing can shift between frames.
Fixes:
- Use slower camera movement
- Start from a strong still image
- Keep clips short
- Avoid chaotic prompts
- Cut away before the artifact becomes obvious
- Use film grain and color grading to soften inconsistencies
Character Drift
The same character may look different in every scene.
Fixes:
- Use reference images
- Repeat wardrobe, age, hairstyle, and facial details
- Train a custom character model when continuity matters
- Generate a character sheet before production
- Avoid changing too many style terms between prompts
Lip Sync Problems
Generated mouth movement is still difficult to control. If the lip sync looks bad, the whole scene feels broken.
Fixes:
- Use voiceover instead of on-screen dialogue
- Show the character from behind or in profile
- Cut to B-roll during spoken lines
- Use wide shots where mouth detail is less visible
- Use a dedicated lip sync tool only when the shot requires it
Prompt Adherence Issues
Sometimes the model ignores part of the prompt.
Fixes:
- Simplify the prompt
- Put the most important subject first
- Remove conflicting style terms
- Separate visual prompts from motion prompts
- Generate the still frame first, then animate it
- Use image references when text is not enough
Inconsistent Scene Quality
Some shots will look polished. Others will feel flat or synthetic.
Fixes:
- Build a style guide before production
- Use consistent lighting terms
- Apply one color grade across the edit
- Regenerate weak shots instead of trying to rescue everything in post
- Use the strongest shots as anchors and cut around them
Frequently Asked Questions
How long does it take to create an AI story video?
A polished 60-second narrative video can take a few hours to a full weekend. Most of the time goes into generating variations, selecting the best clips, syncing audio, and editing.
Do I need a powerful computer to make AI videos?
No. Most AI image and video generation happens in the cloud. A modern browser and stable internet connection are usually enough for web-based workflows.
How do I keep my character’s face the same in every shot?
Use reference images and, for serious projects, train a custom model. A dedicated model gives you a stronger identity anchor than prompt text alone.
Should I start with text-to-video or image-to-video?
For narrative work, image-to-video usually gives better control. Generate the still frame first, approve composition and character consistency, then animate it.
What length is best for an AI short film?
Start with 30 to 90 seconds. That is long enough to tell a complete micro-story and short enough to manage character consistency, clip quality, and editing time.
Conclusion: Start Small, Then Build a Repeatable Pipeline
Creating AI story videos is an iterative process: write, generate, review, animate, edit, and refine. The best results come from clear shot planning, strong reference images, consistent characters, expressive audio, and disciplined editing.
Start with one short scene. Create a shot table, generate a few keyframes, animate them, add voiceover, and cut the sequence together. Once the workflow works, expand it into a full AI short film or repeatable story format.
To begin, open the Fiddl.art Create canvas and generate your first scene, or explore the models catalogue to find the right visual style for your story.